Wood Fired Oven: Building a Pizza oven on a recycled brick base
A DIY Project Using The Melbourne Firebrick Company’s P85 Precast kit
Why Build a Sectional Precast Wood Fired Oven?
This Project was 20 years in the making. It started with a trip to Russel Jeavons Pizza place in the township of Willunga just outside of Adelaide. Russels was no ordinary Pizzeria. it had been voted as having the best Wood fired Pizzas in the world by Gourmet Traveler magazine that year and friends from overseas had booked us in 3 months in advance from South Africa just to ensure getting a table. The oven was out the back and I spent some time Chatting with Russel (over a beer or two) to see how the process worked. By the time he had cooked the first couple of pizzas I was sold on the idea of building my own oven.
I put together plans for building a Pool, Spa and Alfresco area with a dedicated space for a Wood fired oven. I then built everything except for the oven, as I just couldn’t find the right product. I had bought Russels book, which is the definitive work on the subject of DIY wood fired ovens. It not only describes how to build a brick oven, but also includes recipes that you can use to plan a full day degustation. This sounded wonderful and I had images of slow lazy days spent eating and drinking with friends, starting at lunch-time and finishing at midnight. The reality was that I had a busy life and I knew that I would never use the oven if I needed 3 hours to fire it to full soak. The cheap ready-built ovens either didn’t do the job or didn’t look good enough. The large pre-built ovens needed a crane to install and Gas ovens wouldn’t give the wonderful smokey flavour I was after. I also wanted an oven that had a door, so I could also bake bread or slow cook roasts. I had almost given up when I discovered that Sectional Precast wood ovens ovens provided a solution.. Because they were in pieces they were manageable with a 2 man lift. They had enough thermal mass to cook a pizza or roast ,yet they had less mass than a brick oven so would heat up to full soak in an hour and a half. I just had to find the right oven. I selected one called the P85 from the Melbourne Firebrick company that ticked all my boxes regarding function as well as giving me the flexibility to finish it in the look I wanted. Aesthetics are important to me.and as this is a DIY oven there is flexibility to finish it in a multiplicity of ways, from rustic and industrial to modern and slick.
If you like the look of this Wood fired oven. I have uploaded Plans for building it on this link.
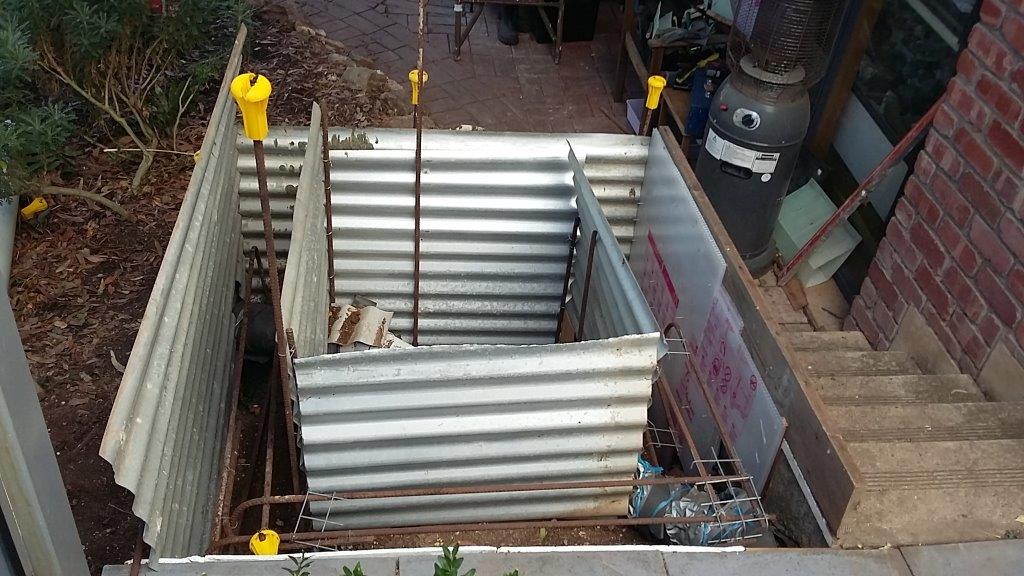
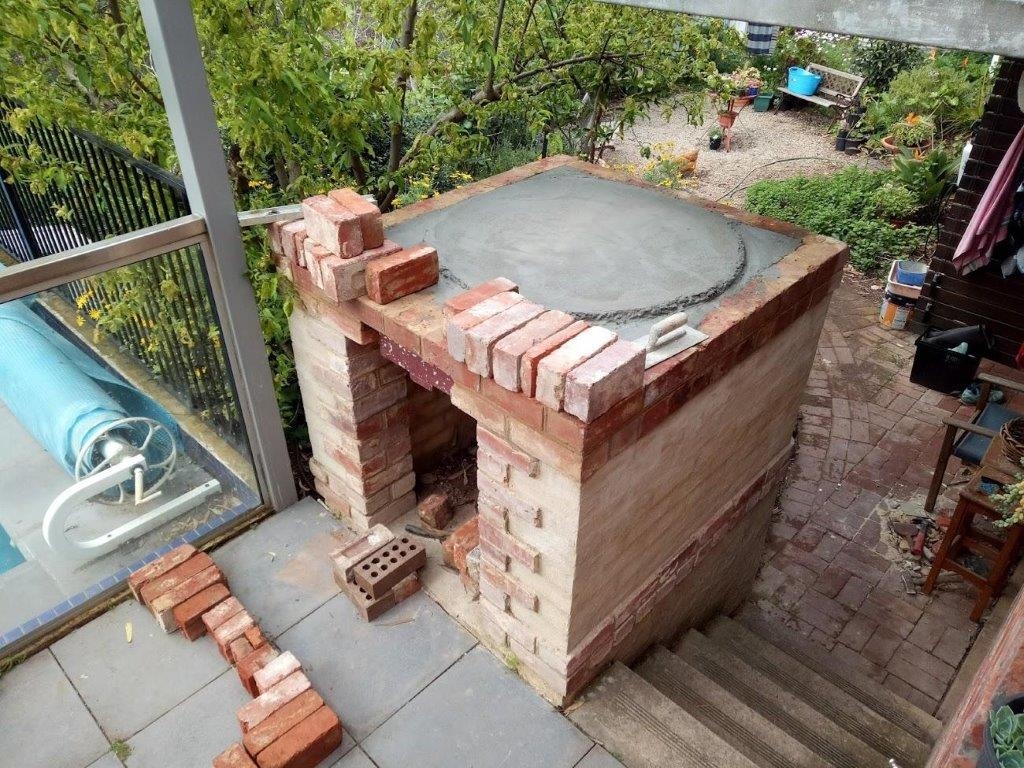
This tricky site was on a slope adjacent stairs requiring substantial footings to provide a level base. Recycled corrugated steel roof sheet was used as form-work
Footing poured and 1st layer of bricks lain. I planned on just one layer of bricks a day as I only had about 2 hour time-slots available for this project. Left over mortar was used to roughly render the base. Note the corrugated iron inside the lower base. This is removable so I can service my storm-water pipe from the upper patio and a water supply pipe from a void I left underneath if needed. The storm-water pipe outlet is just visible to the right. The tree adjacent is a very good bearing nectarine so I cast the footings around the roots with a protective layer of 40mm of foam wrapped around them rather than cutting them….It couldn’t have been a trickier site as the pool adjacent was a width restriction. It also dictated the height of my oven landing as there is a National construction code rule of having no climbable feature adjacent a pool fence. The landing therefore needed to be a minimum of 1200mm above the patio
–
The wood oven base is taking shape: As the house is built from a rustic brick I used recycled bricks as feature courses as well as quoins. I salvaged these old bricks from a local creek-bed. I designed the oven so that I could use new plain bricks, rendering over them disguising their origin for the bulk of the oven. These were from a salvage yard left over from new builds.
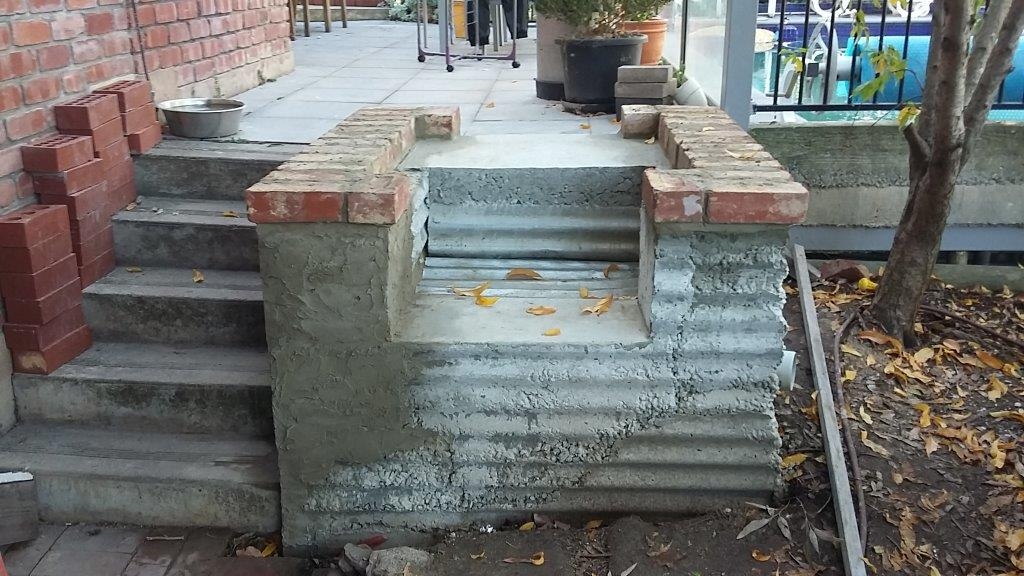
Showing the slab preparation before the pour. I used 12mm rods in both directions as well as mesh just to be sure. They were left over from my pool pour so didn’t cost me.
I poured my upper slab with an upstand to suit the p50 base height. Note this was necessary as the brick coursing didn’t match the slab base requirement. This was only important as the top of my firebricks were designed to be exactly 1200mm above the ground and I had a balcony cantilevering above the oven ( the edge beam is just visible in the top of this photo). I had worked out that I only had a 40mm tolerance between the finished dome top and the balcony underside. This proximity was only allowable by code due to the fact the balcony is made from cantilevered concrete and steel and so isn’t combustible. Note the “ash drawer” feature I built into the design. Very handy and a recommended addition to any oven.
The start of the P50 kit is the laying down of the Calcil (fireproof and insulative board) base. (the Melbourne Firebrick company template is shown pinned on top)

The Calcil base is covered with aluminium foil and the pre-cut firebricks (all part of the kit) are laid on a special mortar. Three different types of cement/mortar products are supplied with the kit. Each has a specific use and even though the instructional You-tube video was great I still needed to carefully read all the bags to make sure I used the correct one.

The dome is in 4 individual (but still a 2 man lift) pieces that you first mortar together and then apply “bandages” of mortar over the joints. There is a central hole between the 4 pieces that require a small pour of concrete to act as a “Keystone” locking it all together
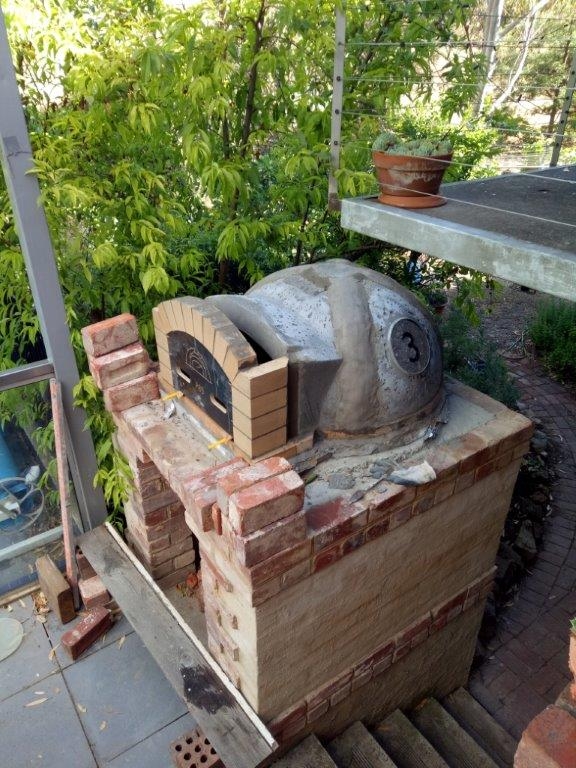
The arch template is put in place and the pre-cut arch bricks are then mortared into position
The precast flue gallery is mortared into position. This is probably the only step that took me less than two hours. The only trick was to ensure that it remained level.
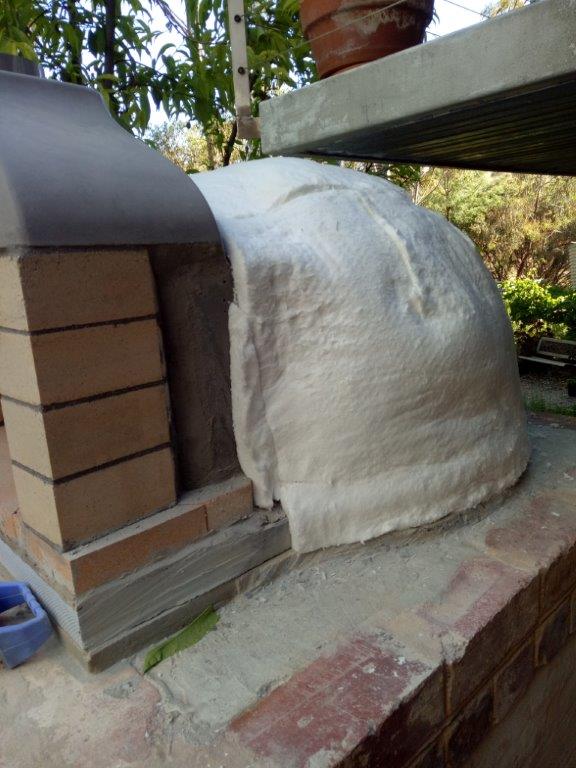
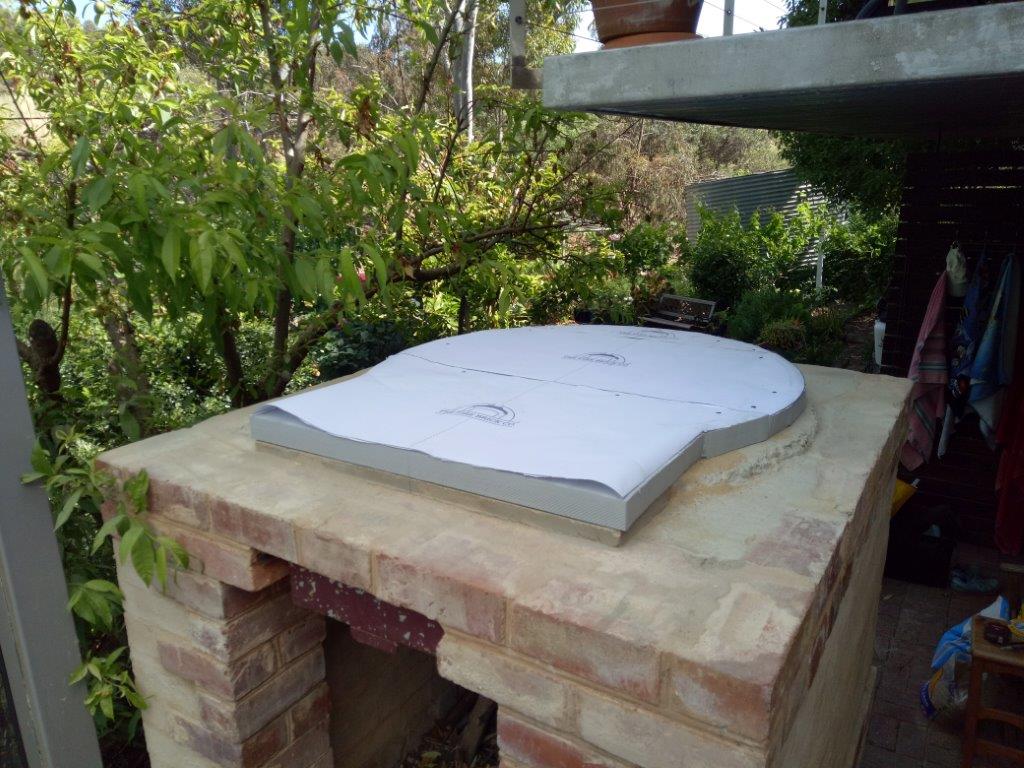
The ceramic fibre blanket is fiddly to install and there are lots of nasty prickly fibres. The kit however supplied large plastic gloves which helped keep these off my skin. Very helpful…
Aluminium flashing as moisture protection for the blanket is then lain around the base. This is an optional extra in the kit. Because I had the 20mm concrete upstand on my base (visible on the last photo) I probably didn’t need it but I was making sure. If rain somehow gets into your blanket it will slow down your heat soak time. So well worth the few extra dollars and time.
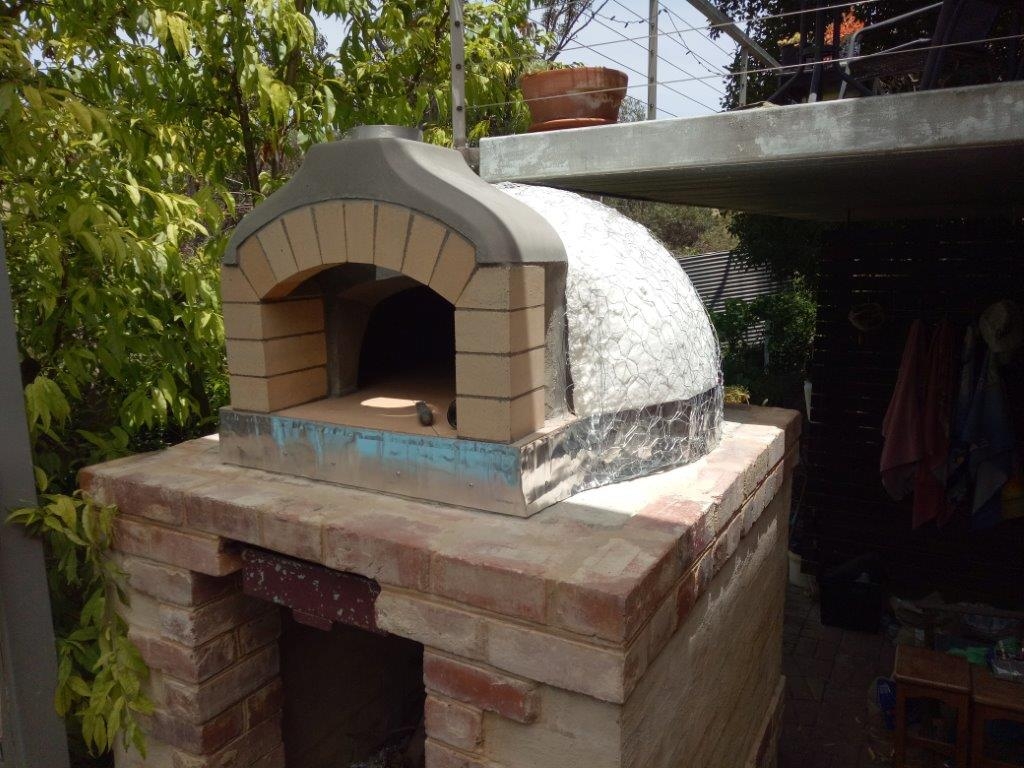
The first layer of perlite render is applied. The landing is being placed. The landing was old granite product samples I had lying around. Being green and able to up-cycle means tossing nothing away. I had these for 20 years before I found a use for them. The thick one was used for building facades and the thin one a floor tile. I had to grind down the bricks to suit so I could inlay them level with the brick top.

The next layer of render is put on and the landing finished. The piece of foam on the landing is the render float that is supplied with the kit. It really made rendering the curve simple.

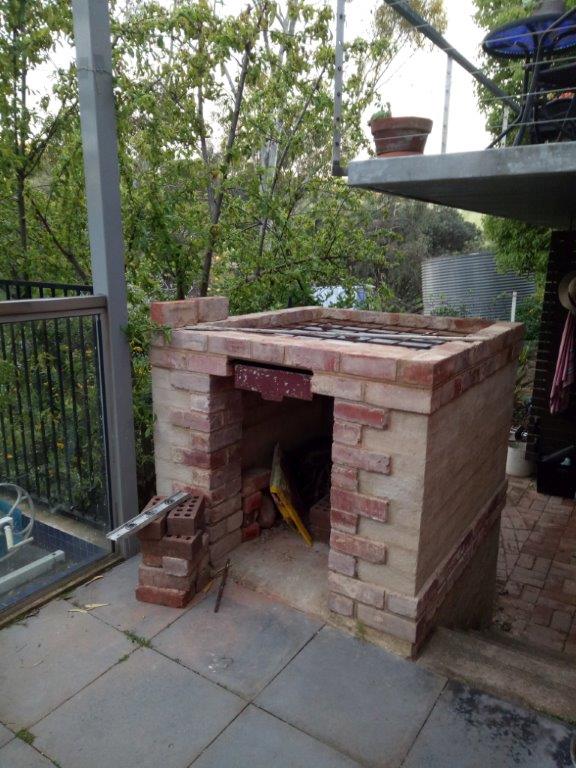
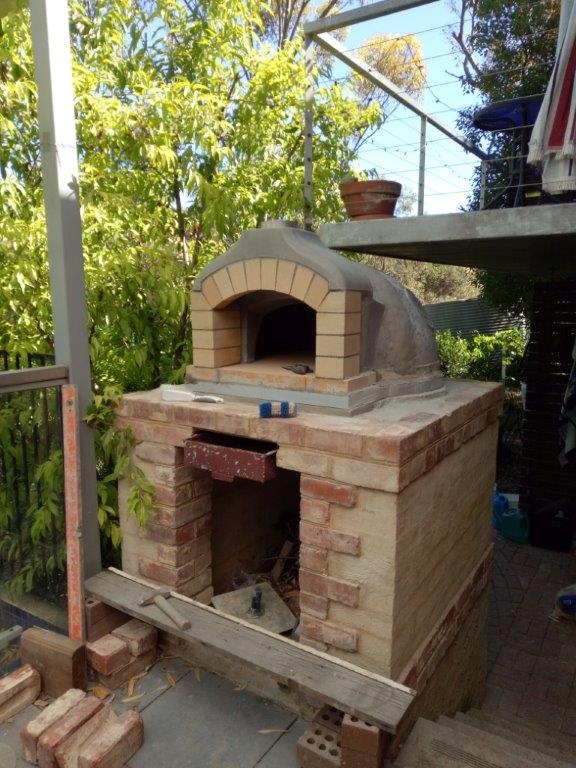
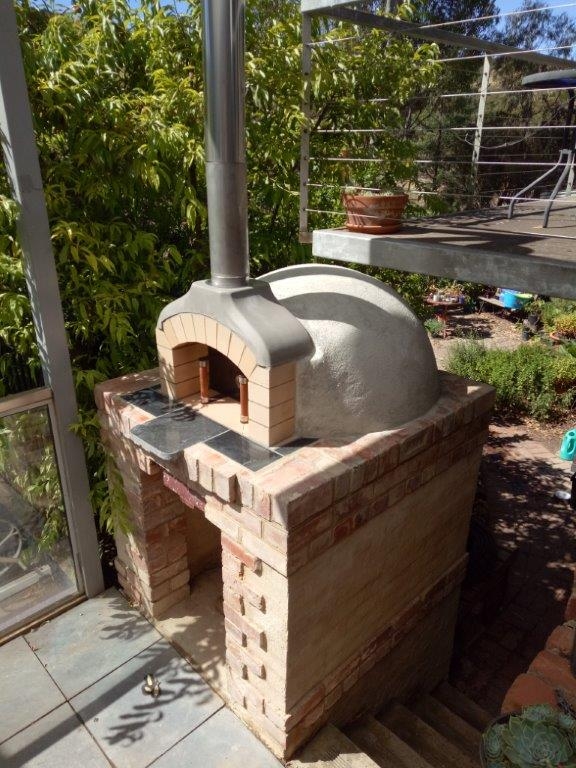
The finished product and the first fire. There were paints supplied in the kit to make this look a bit slicker, but the industrial look was perfect for me and so I left everything raw. The oven needs to be slowly cured with a succession of small fires increasing the heat-load each time. Note that I have an extension on the flue. The supplied kit flue is slightly shorter than required in fire-risk areas. I put an additional 500mm flue on that I had left over from my combustion heater installation. The ash drawer was something I salvaged when I was working as a factory hand 40 years ago. An apprentice had made it about 50 years prior. Throw nothing away…you will need it one day.
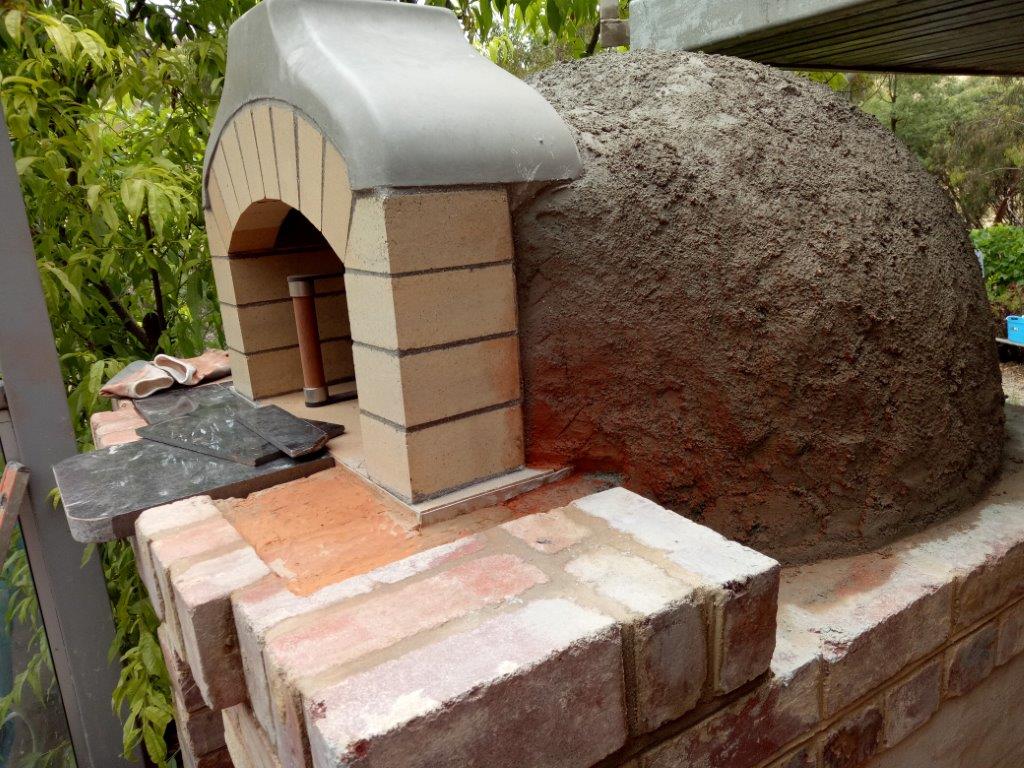
A view from above to show just how much space there is between the balcony and the oven. This was the perfect spot for the oven both aesthetically and functionally, but it the absolute worst spot when it came to complexity and planning. Every course had to be checked to ensure I was not going to miscalculate the height. Being on a curve made it even trickier as the apex of the oven is actually above the landing.
Fireproof paint and Acrotex render came with the kit which would achieve a modern and slick look, but I chose not to use these and leave everything in a natural finish as I wanted an Industrial/Rustic look.
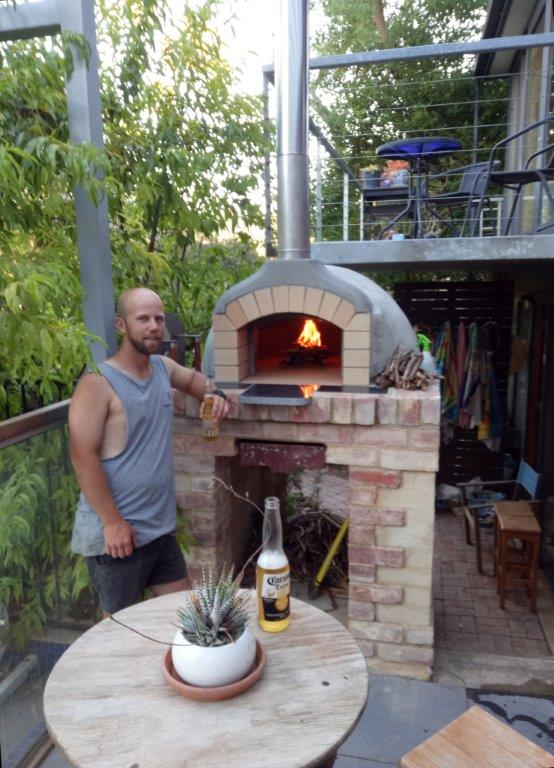
All done and smiles all around. Time to do what you do when you fire up the oven…
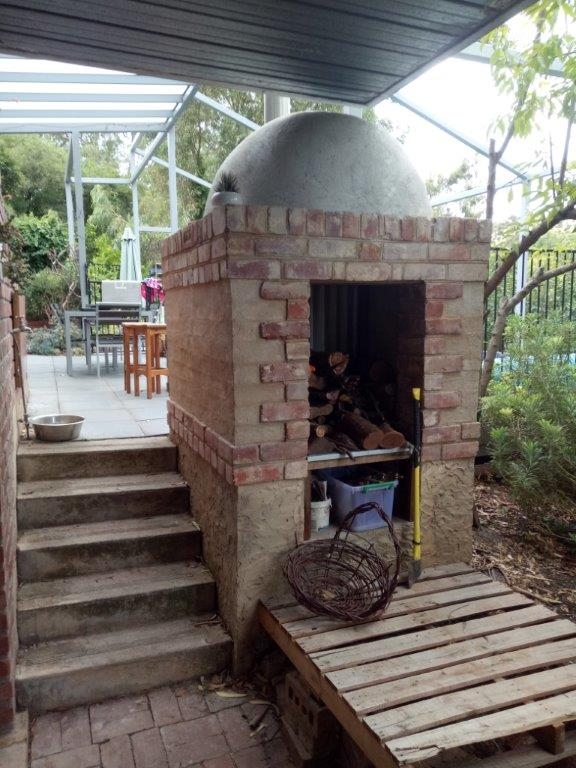
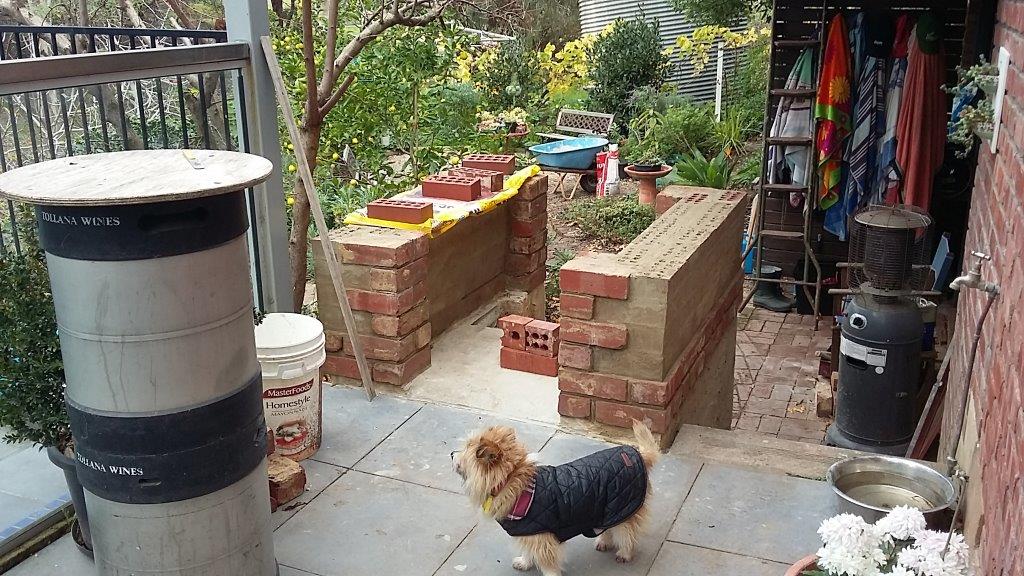
Rear view showing the segregated Wood storage bays. I have a seperate section for the cardboard squares and 400mm long kindling I use to start the fire and another for the good sized logs.. A little space off the ground is needed to saw up the windfall branches that I use to start my ovens fires.Currently just an old pallet and a splitting log serves as my work area.
I plan on upgrading this by stripping back a second pallet and using this as a timber skirt around the base of the top pallet. I just need to find the time.. Note the rustic basket. This was my first weaving project made from Catoneaster prunings. It isn’t for show, but is a useful item to help collect small twigs from the back creek.
Fitout: I recycled some old corrugated iron as a partition to separate the rear wood storage bay from the front utility storage bay. I am uncomfortable with storing wood (especially kindling) directly under the oven as there is always the risk of a spark. As I am in a fire-risk area I also plumbed in a tap adjacent the oven (next to the bench) so I have ready access to water… just in case.
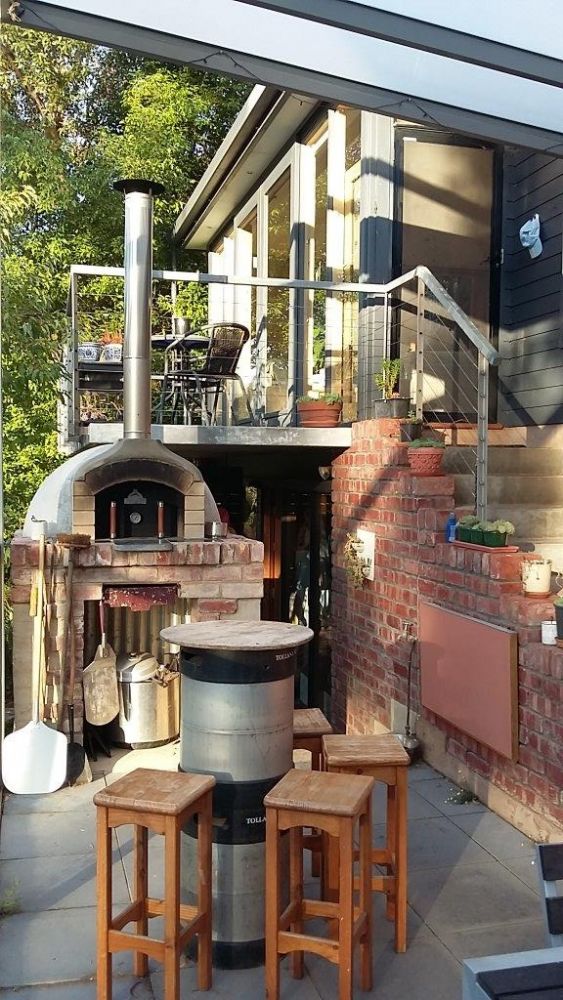
A bench for making the pizzas that is within a peel’s distance of the fire is handy. I was tight on space so I hinged my bench so it folds up out of the way when not in use. I recycled this from a piece of old laminate benchtop I kept when I upgraded my kitchen. A couple of old Stainless steel wine barrels fixed end to end with a piece of marine-ply on top makes an excellent serving bench and doubles as a space for a quiet beer when the oven isn’t being used. Although they would easily clean off easily with a wet rag I have purposefully let the smoke stains build up on the arch. They are a badge of authenticity, reflecting happy days with friends.